Workspaces
Invite & Manage Members
You have the ability to manually manage users within a workspace by inviting, removing, and promoting or demoting them. To do this, navigate to the workspace settings via the top right corner of the workspace page and click on the "Members" tab.
Inviting Users
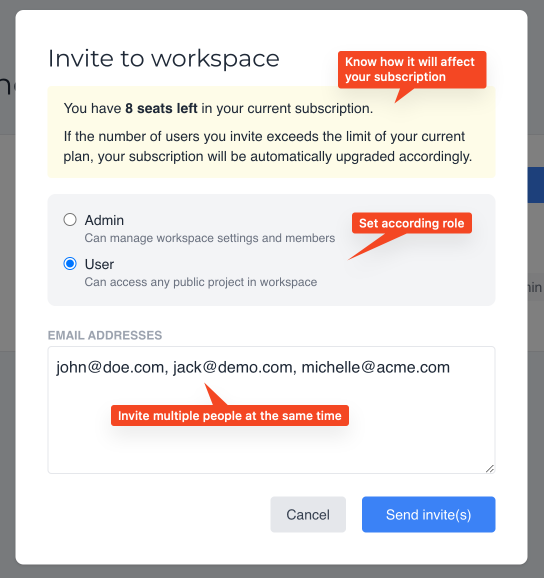
To invite users, click the "Invite" button and enter their email addresses. For multiple invitations, separate each email address with a comma.

Roles and Permissions
When inviting users, you can assign them one of the following roles. Exercise caution when assigning roles, especially the Admin role. Admins have full control over the workspace and can assign the same role to other users.
Admin
- Can invite, remove, and promote/demote any user.
- Can manage general workspace settings.
- Has access to any public project within the workspace.
User
- Can invite other users.
- Has access to any public project within the workspace.
What about guests?
Guests are users who have been invited to specific projects within the workspace. They have limited access to the workspace and can only view the project they were invited to. Guests cannot access other projects or workspace settings. They are invited directly from the project details page and not in the workspace settings.
Guests are not allowed to invite other users or manage workspace settings. They simply have access to the project they were invited to and are able to view and comment on tasks.
Removing Users
As an admin, you can remove users by clicking the three dots button next to their name. This action will revoke their access to the workspace and all associated projects.
By managing roles and permissions carefully, you can maintain a secure and organized workspace environment.
